

This step by step guide will take you from getting your domain name to setting up your hosting and installing WordPress. This will come in under $25 by the end of the set up and that will have a year of hosting!
NameCheap.com offers shared hosting right now for 50% off the first year. The lowest tier hosting plan comes in at just $15.44 for the entire year of hosting!
How to Get this Great Deal
First head over to NameCheap.com by using this link >>>Click Here<<<<
You want to click on the Get Started Button under the Stellar Plan.
If you want more options with your hosting you can go up to the Stellar Plus Plan.

On the following page click Purchase a new domain button
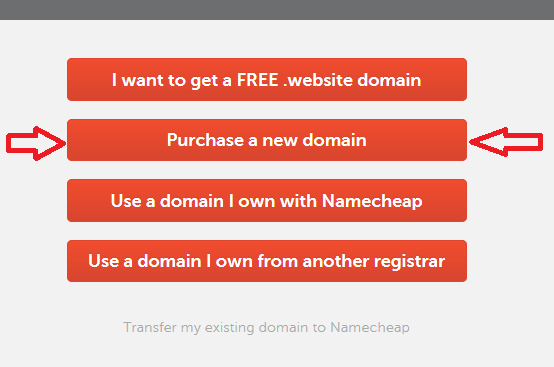
If you already have a domain you can either click on the “Use a domain I own from another registrar” or you can also choose the option at the bottom to transfer your domain to Namecheap.
This tutorial will concentrate on purchasing a new domain since that is what many will be doing.
Now you put in your chosen domain name and press “Add New Domain to Cart”

If your first choice in your domain name isn’t available that’s ok! Just keep trying and you will find something that is available.
If you need help trying to figure out what domain you should use we have an article that will help you get there:
Tips for Choosing Your Blog’s Domain Name
After you have your domain name picked out you then want to hit the continue button on your cart:
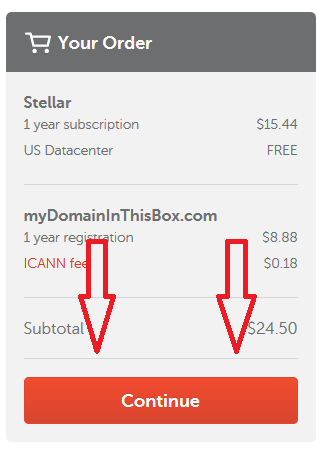
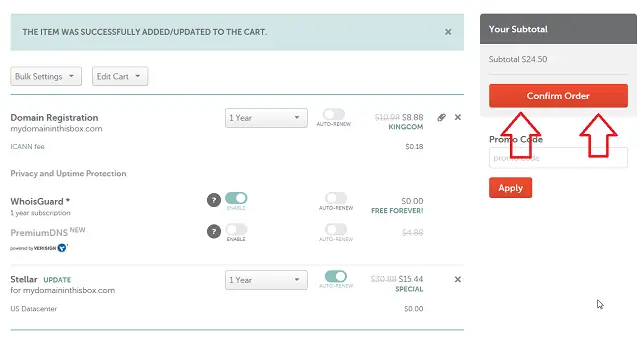
Next review your order. Keep WhoisGuard enabled, this is a free service from Namecheap and helps protect your identity and information such as address and phone number.
When you are done click on Confirm Order
Now if you have a Namecheap account go ahead an log in, or fill out your info to create an account.
Once you have all your info and proceed through the checkout process we then need to get WordPress set up on your new site!
After you receive confirmation that your order has gone through, it can take up to 30 minutes for your new hosting to become active.
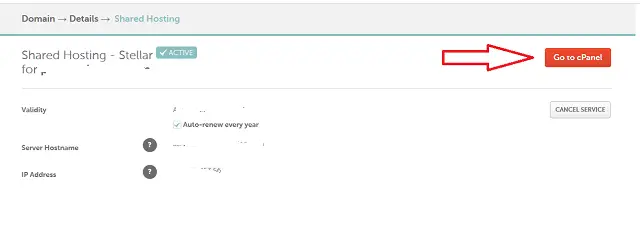
After your purchase is complete you will see your Purchace Summary with the hosting package listed and a big orange Manage button, click on that button.
On you Shared Hosting page click the Go to cPanel button
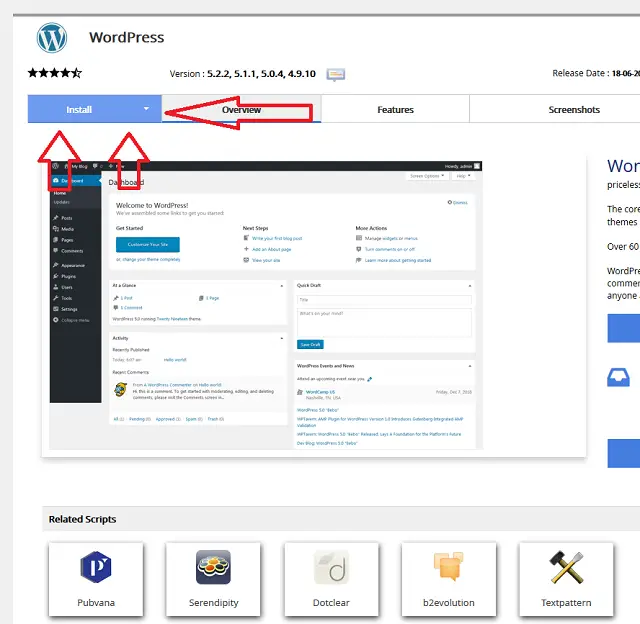
In your cPanel scroll down until you see Softaculous Apps Installer section and click on the WordPress icon.

Now Press Install
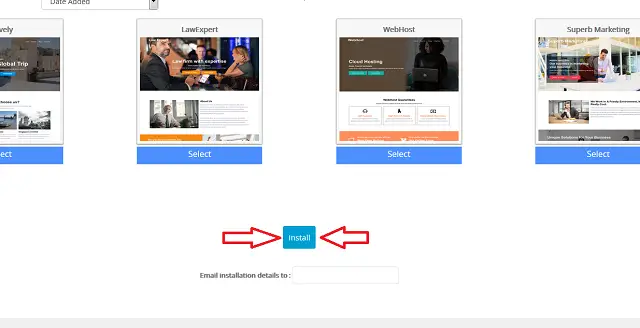
Now fill out your Blog Title and Description
This next page you will put in your Site Name and description.
If you want your blog to be in a certain directory then you would put that on this page. For example if instead of your blog being at www.yourDomain.com and you want it to be at www.yourDomain.com/blog then you would put blog in the directory box.
Also pick out an admin Username and password. Do not use the defaults!!!! Also put in your email you will be using. If you just have a gmail at this time that’s ok for right now.
There is a section to pick out plugins on install, I highly recommend using Loginizer and W3 Total Cache.
You can wait on picking a theme, just go with the default.
At the bottom of the page click the Install button
Congratulations! You now have a blog installed.
The final page will give you the Administrative URL where you can go and get started on personalizing your blog and writing your posts.
